In our current climate of easy recipes and quick cooking, sautéing onions until they are browned (or “caramel” colored) have become synonymous with being caramelized onions. For most people, it is perfectly acceptable; they are nicely flavored and lightly roasted, perfectly delectable and edible. I am one of those people. I won’t sit here and proclaim the calamity in which we have distorted and/or de-valued a time-honored, traditional cooking technique. While I do know the proper difference between sautéed onions and caramelized onions, I am guilty of lumping them together and using the two interchangeably. For example, in my pizza recipe, the “caramelized” onions only take 15 minutes to make. I suppose technically the word “caramelized” should be dropped from the recipe title, but should it? Just because I did not properly caramelize the onions in that particular instance does not mean I won’t do so in the future. For me, it basically boils down to timing. If I have the time, of course I will prepare my onions to develop that uniquely satisfying flavor that only comes with lovingly cooking them for an hour. But the reality is not everyone has the time, nor do they care whether or not they are offending some food purist out there. Of course I have my own opinions, but if you were to ask me, I would say it’s your kitchen and your meal, so do as you please! Though for the sake of education, since our goal is to share and learn, here is how I caramelize my onions. It is very easy actually. All it takes is some patience.
onions
olive oil or butter
salt
sugar
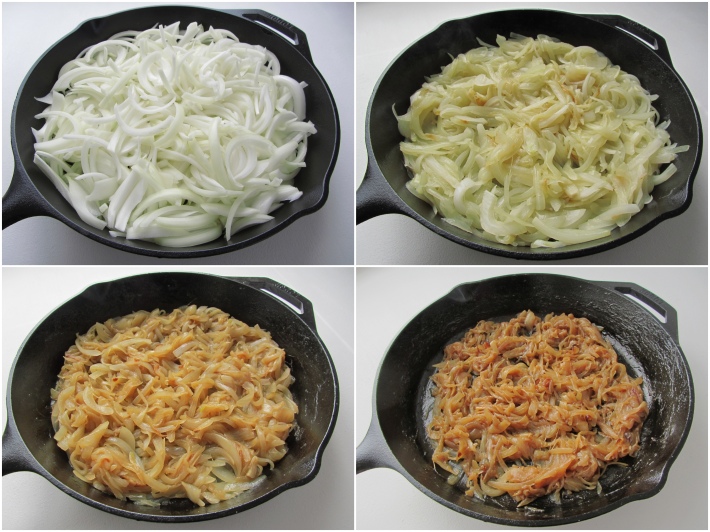
1. Cut off the top and bottom of the onion, and cut in half, vertically. Peel and discard skin. Lay cut side down, slice into 1/4 inch slices. Slicing vertically from pole to pole means you are cutting parallel to the fibers of the onion, allowing it to break down more when cooking, which will deliver a better end result (versus a horizontal cut [ie. onion rings], which is against the fibers and done so to retain structure during cooking). Cook onions in a skillet over low heat with a drizzle of olive oil or a small nub of melted butter, stirring occasionally so they cook evenly. I like to use a cast iron skillet because it retains a constant, even heat over the low flame, and the seasoned surface keeps the onions from sticking, which helps prevent scorching.

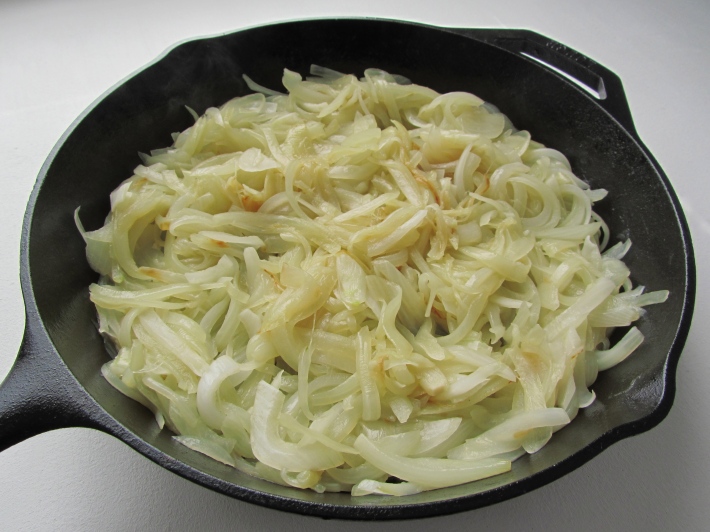
2. After 10-15 minutes, they will begin to soften and turn translucent. Add a pinch of salt (I like to add one pinch per onion) and continue to cook, stirring occasionally every 2-3 minutes.

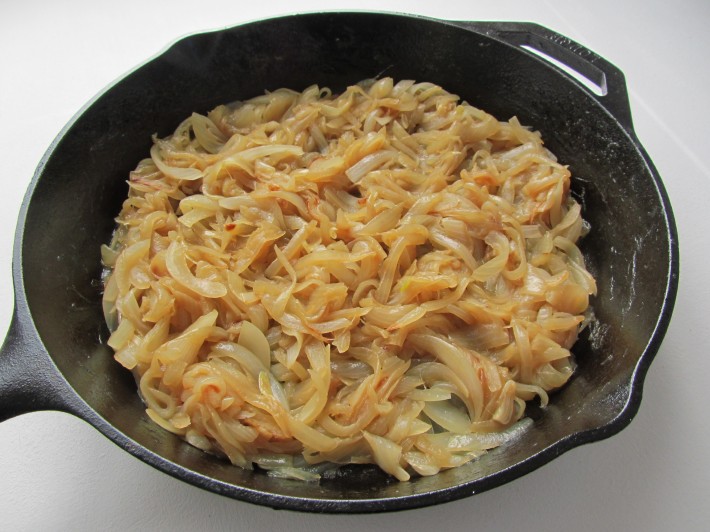
3. After another 10-15 minutes, the onions will have turned amber, signaling the start of caramelization. They have sweated out excess moisture, which allows the natural sugars to be activated from the heat to begin cooking. At this point I like to add a pinch a sugar to encourage the process. Continue cooking over low heat, and stir occasionally every 2-3 minutes to prevent any scorching or burning. Reduce heat if needed.

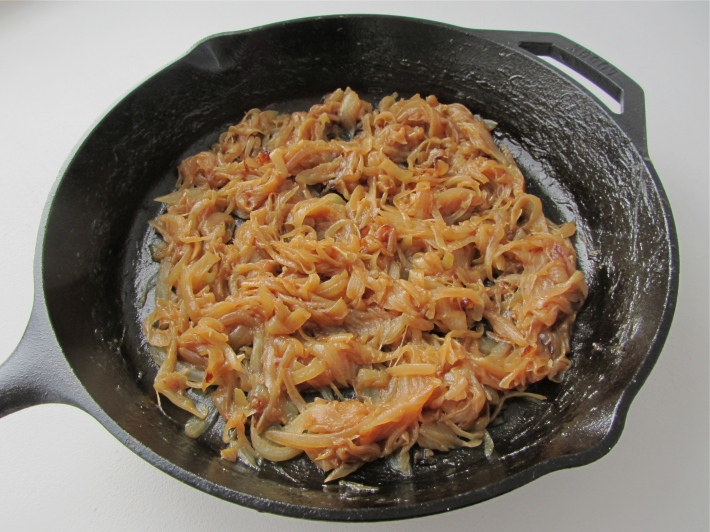
4. Continue cooking for another 10-15 minutes, until the onions have reached a rich amber color. The darker the amber, the more intense the flavor. But be careful, at this stage, they go can go from beautifully amber to horribly burned in a blink of any eye! So pay attention, you wouldn’t want to ruin all your hard work!

5. It took some time, but wasn’t that easy? Now go reap the flavorful fruits of your labor!

Pingback: Caramelized Onion and Mushroom Pizza with Truffle Oil and Egg « I'm Not A Cook
Pingback: Caramelized Onion Tart « I'm Not A Cook